Tour Our Course
Prairie Landing Golf Club’s Score Card, Golf Hole Yardage, and Practice Facilities
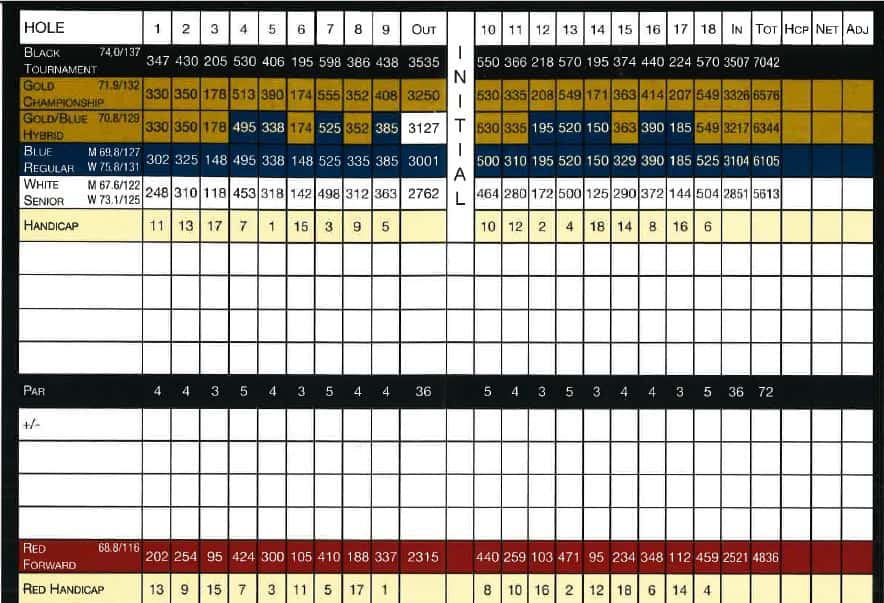
Scorecard
Practice Facilities
In addition to a fabulous 18-hole golf course, Prairie Landing is also home to one of the best practice facilities in the area. Featuring a multitarget, grass and artificial tee driving range with stretching apparatus, yardages, and convenient automated range ball dispensing machine. Complementing the driving range are two regulation par-4 practice holes, large practice putting green and short game practice area.
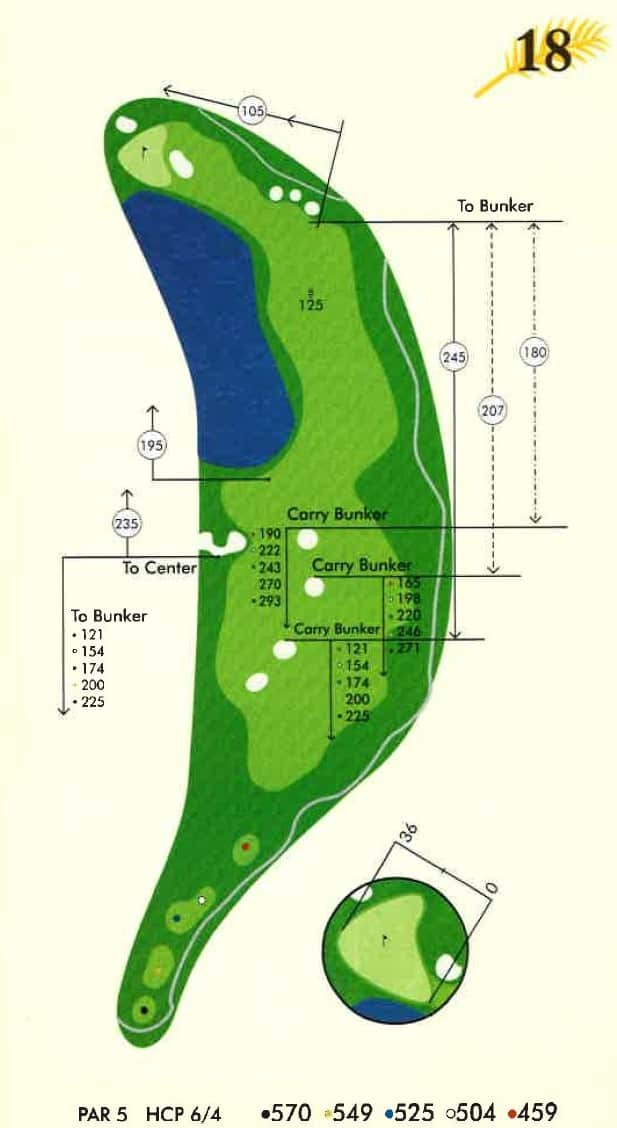
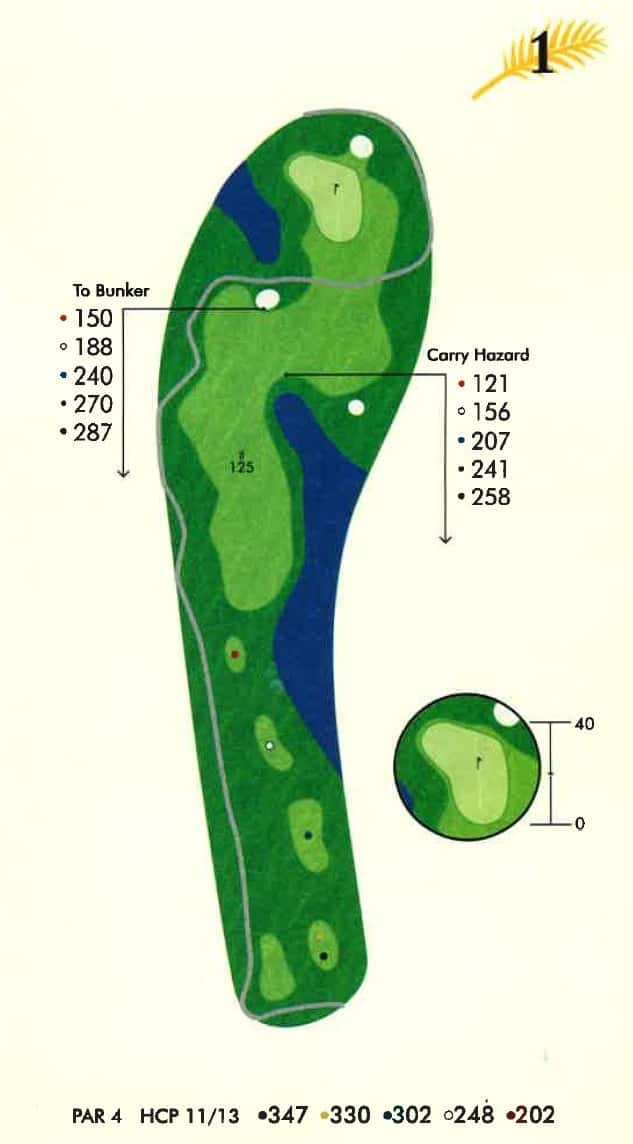
Yardage Book
Hole #1
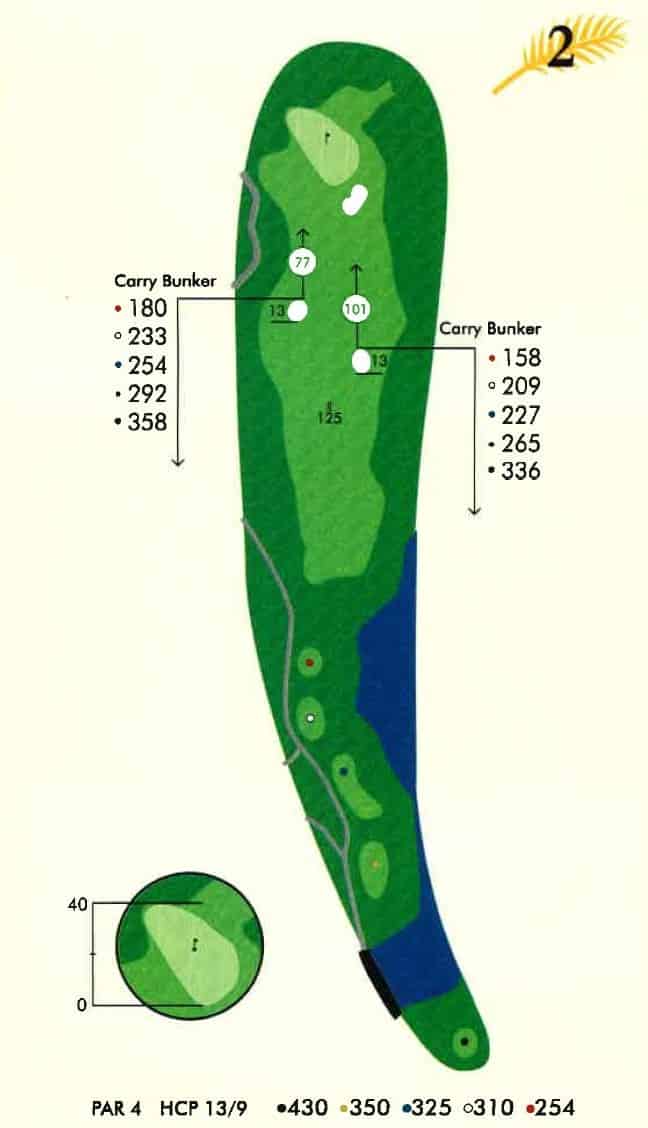
Hole #2
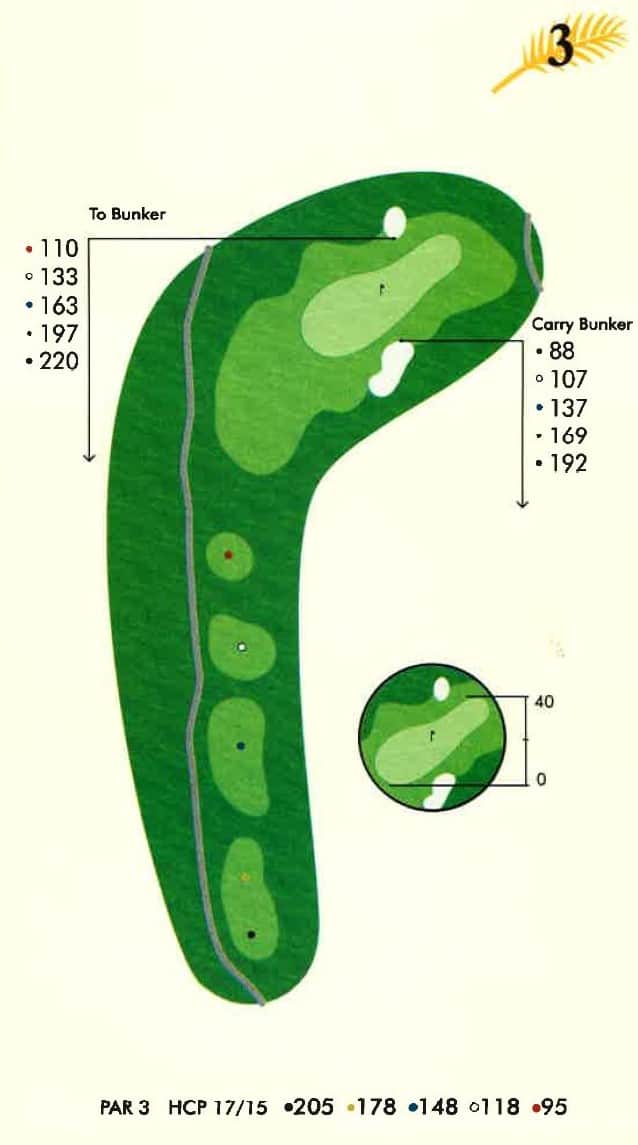
Hole #3
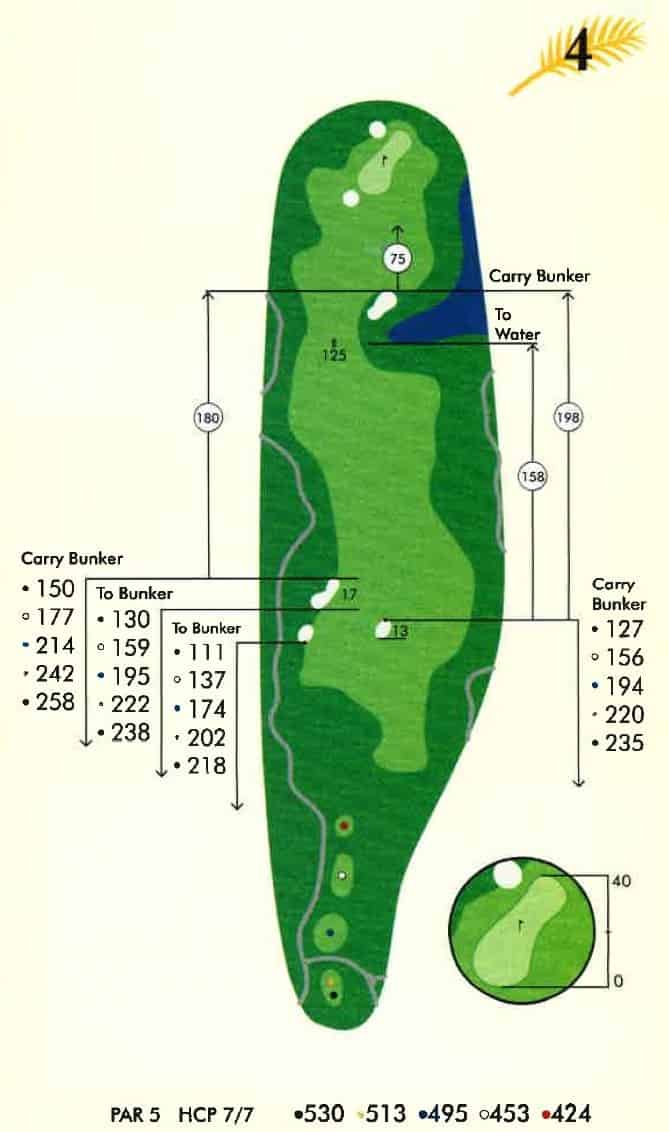
Hole #4
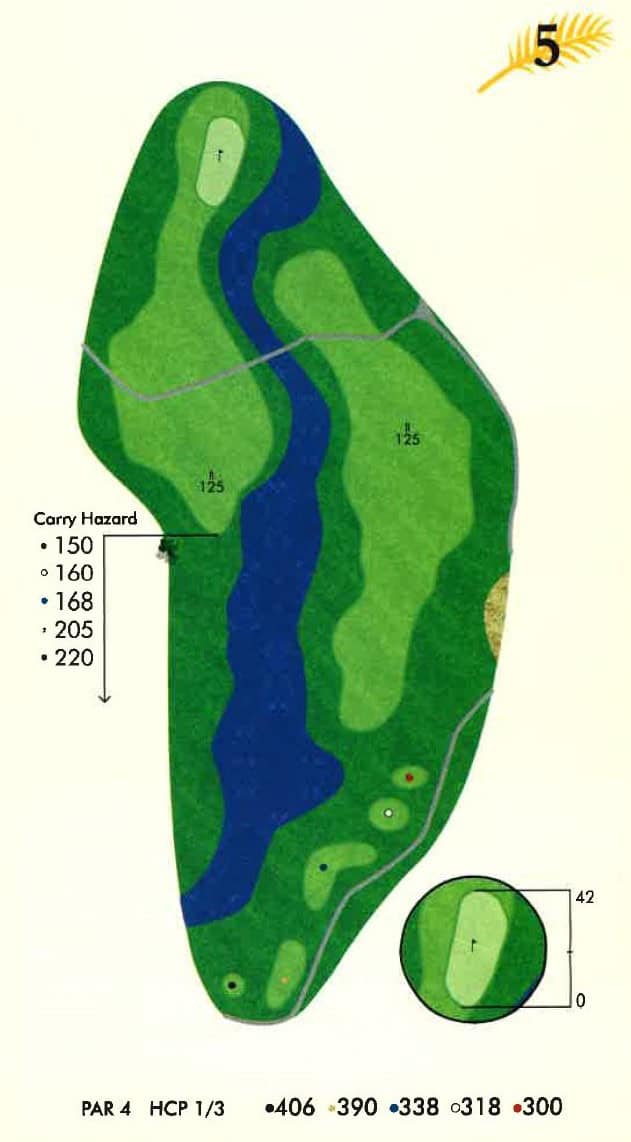
Hole #5
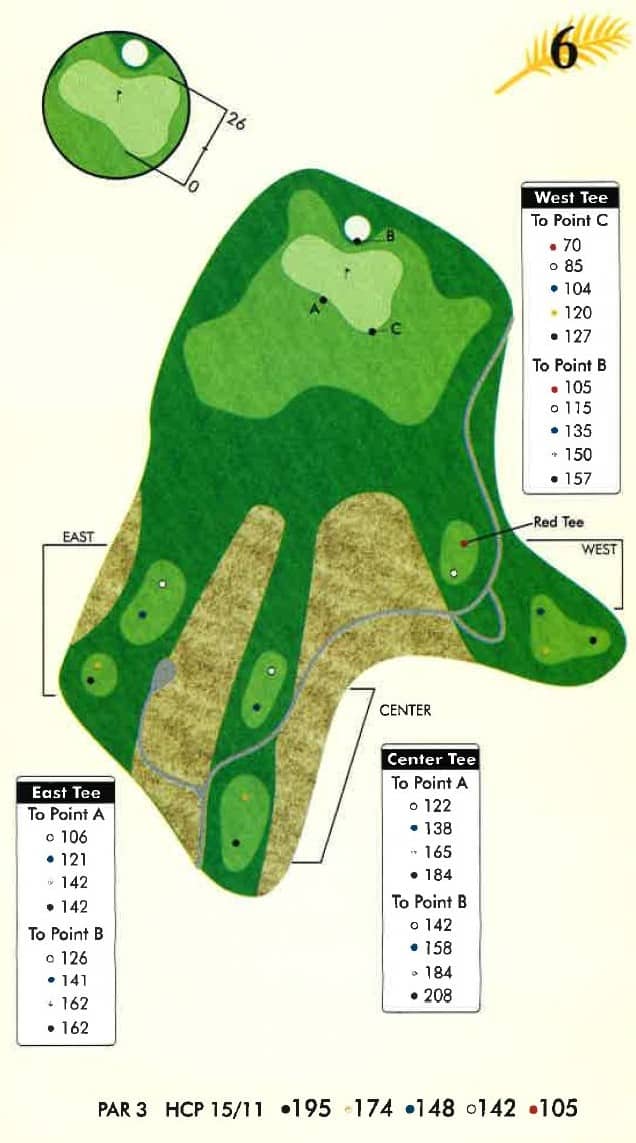
Hole #6
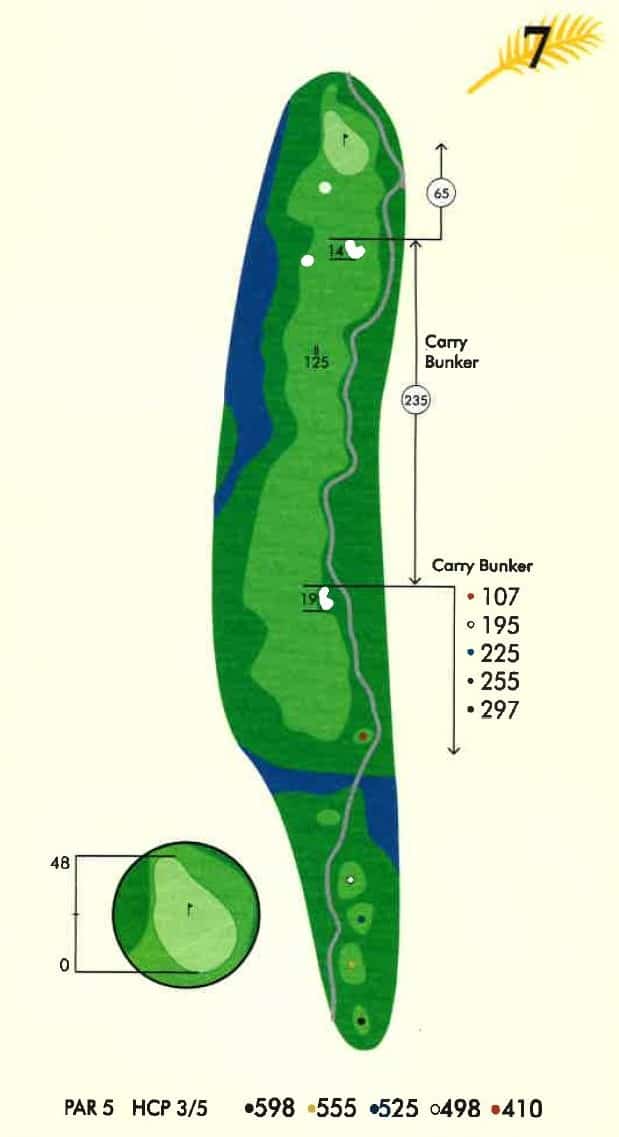
Hole #7
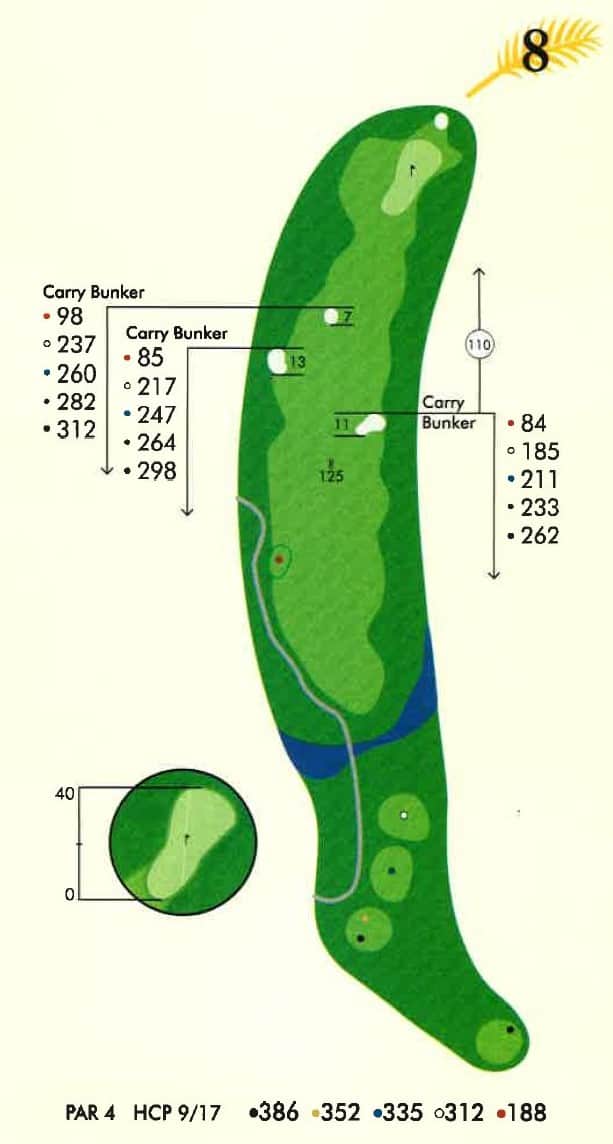
Hole #8
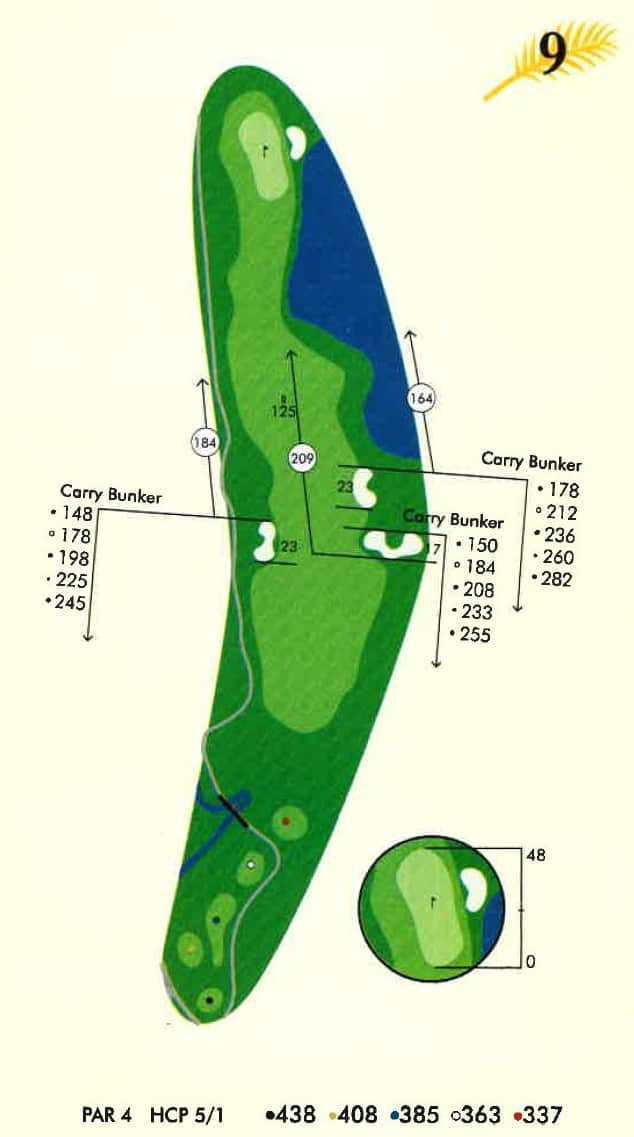
Hole #9
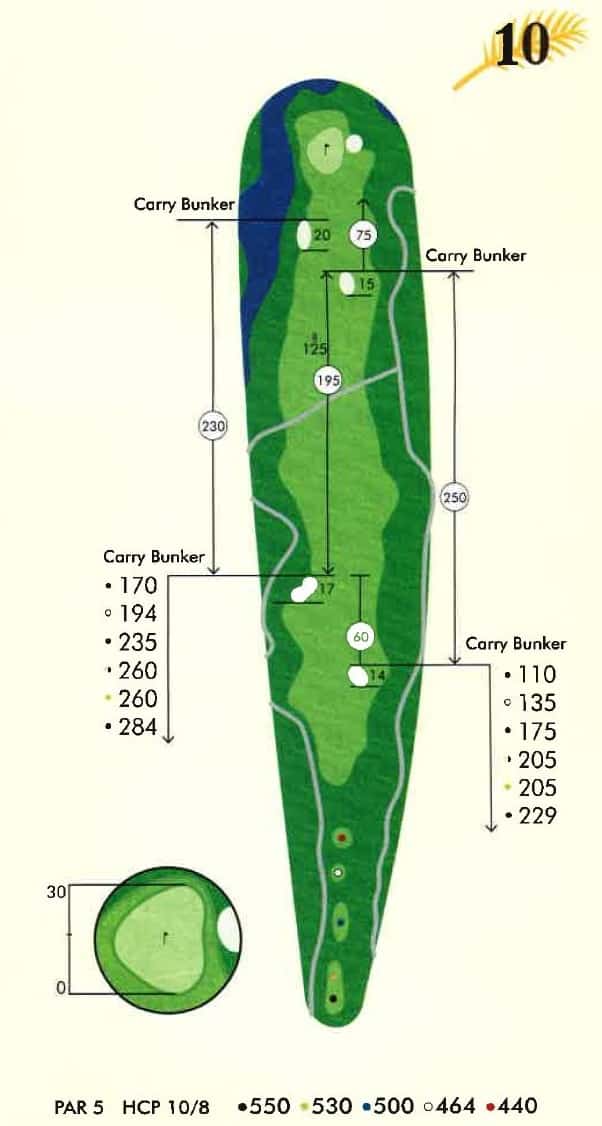
Hole #10
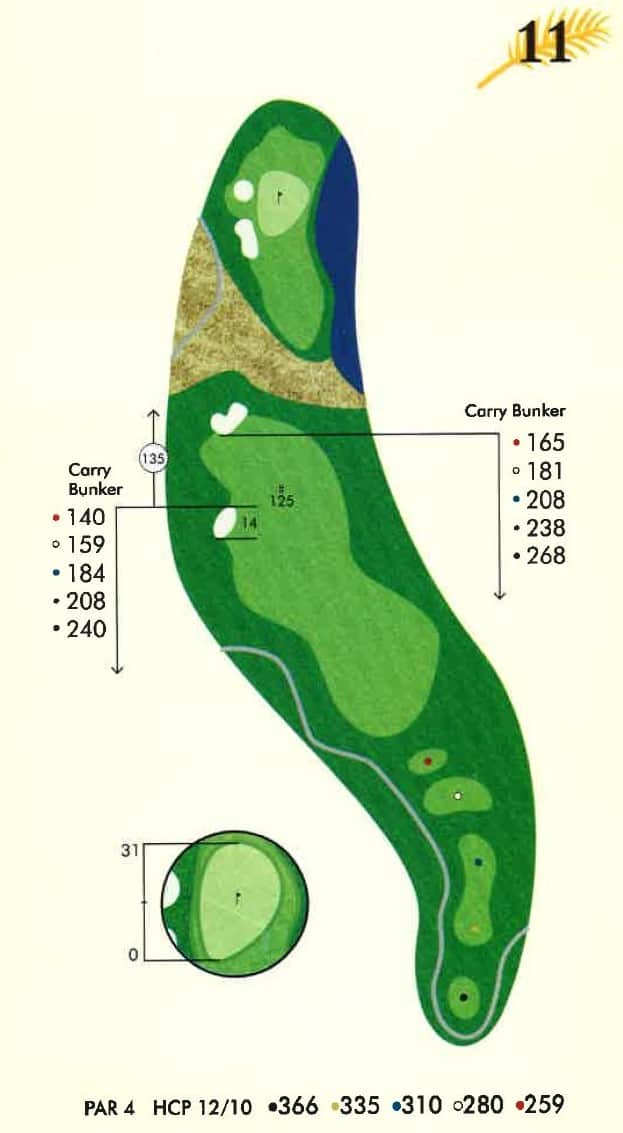
Hole #11
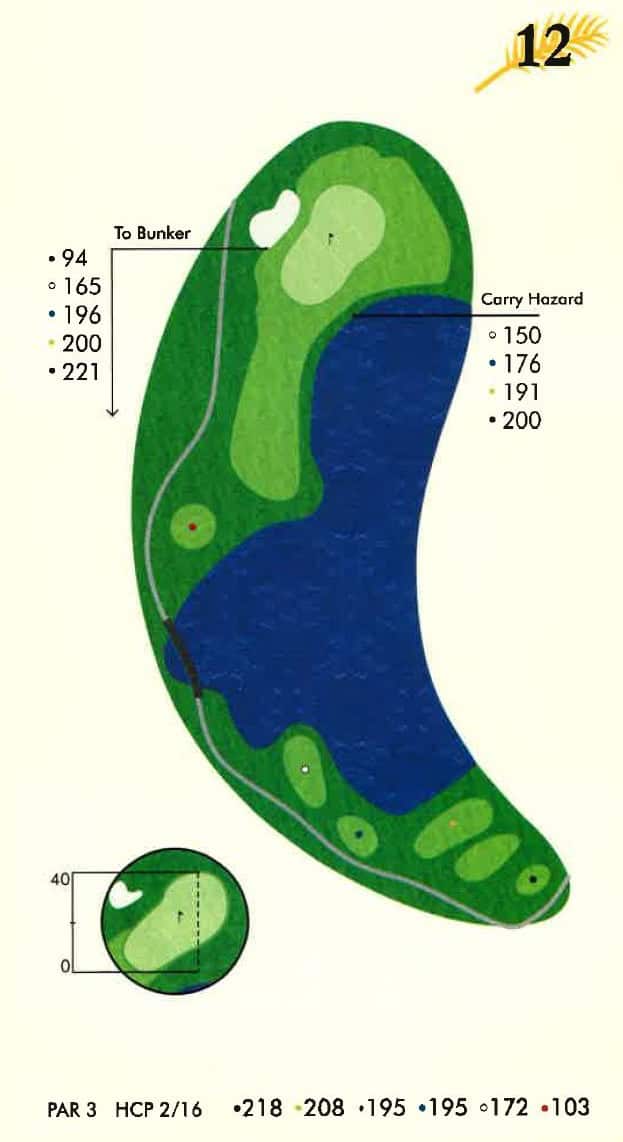
Hole #12
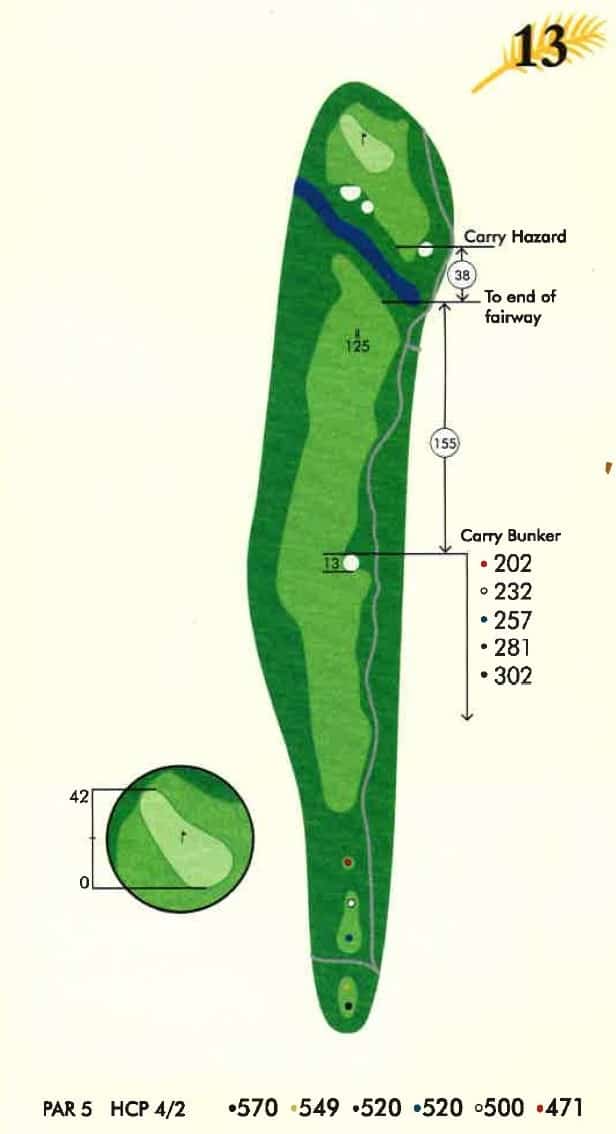
Hole #13
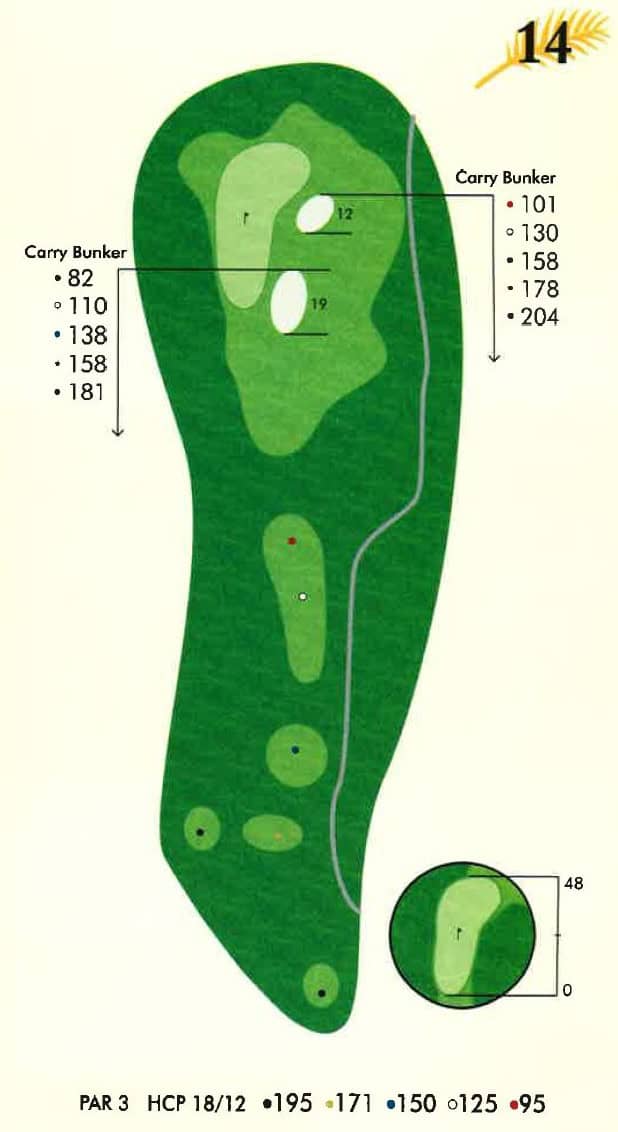
Hole #14
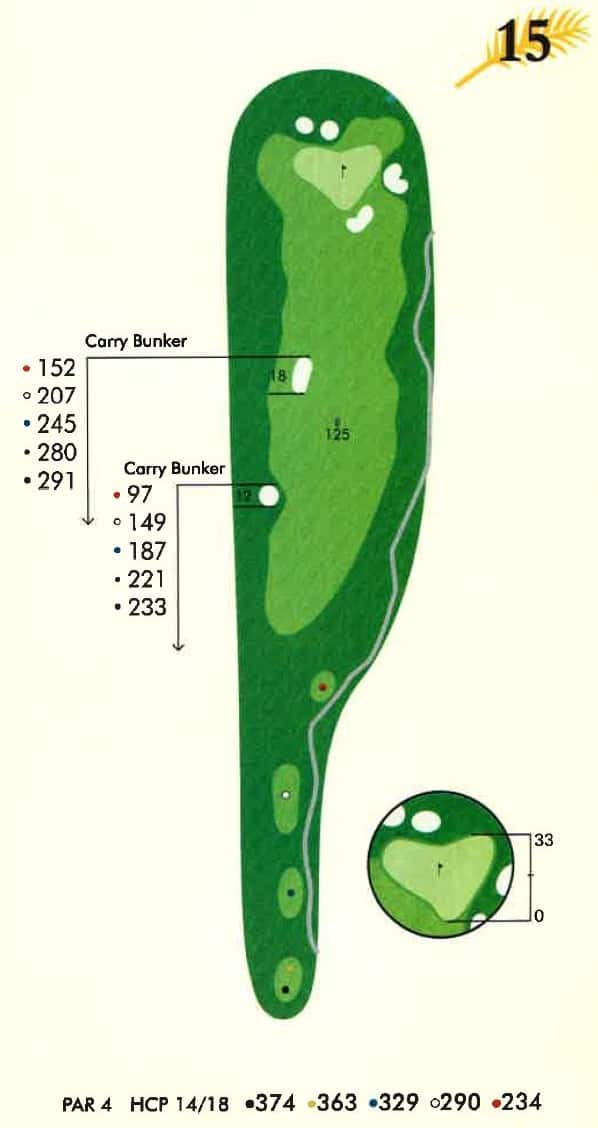
Hole #15
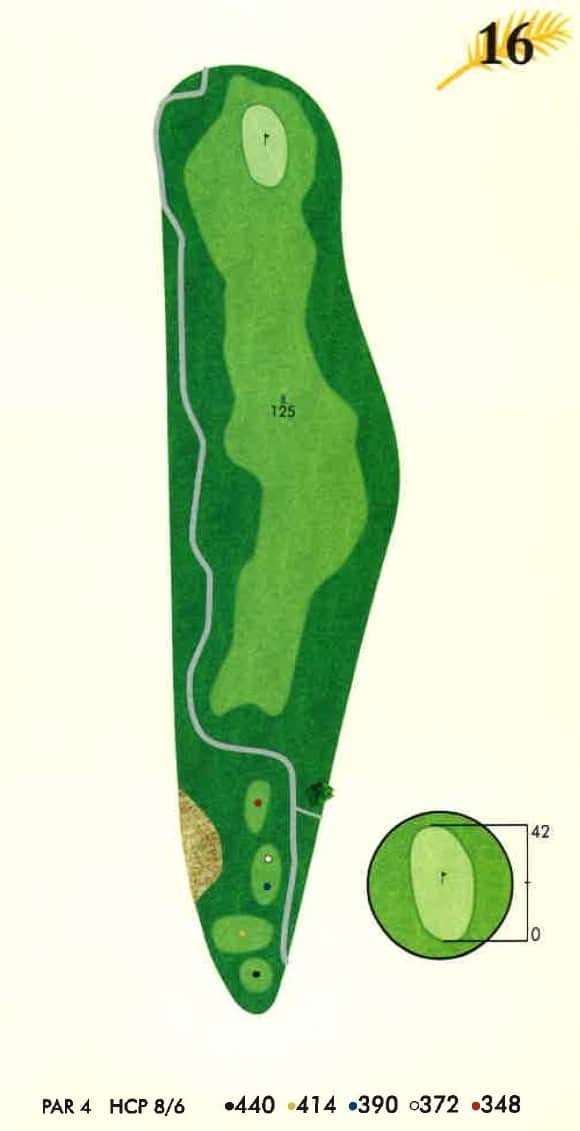
Hole #16
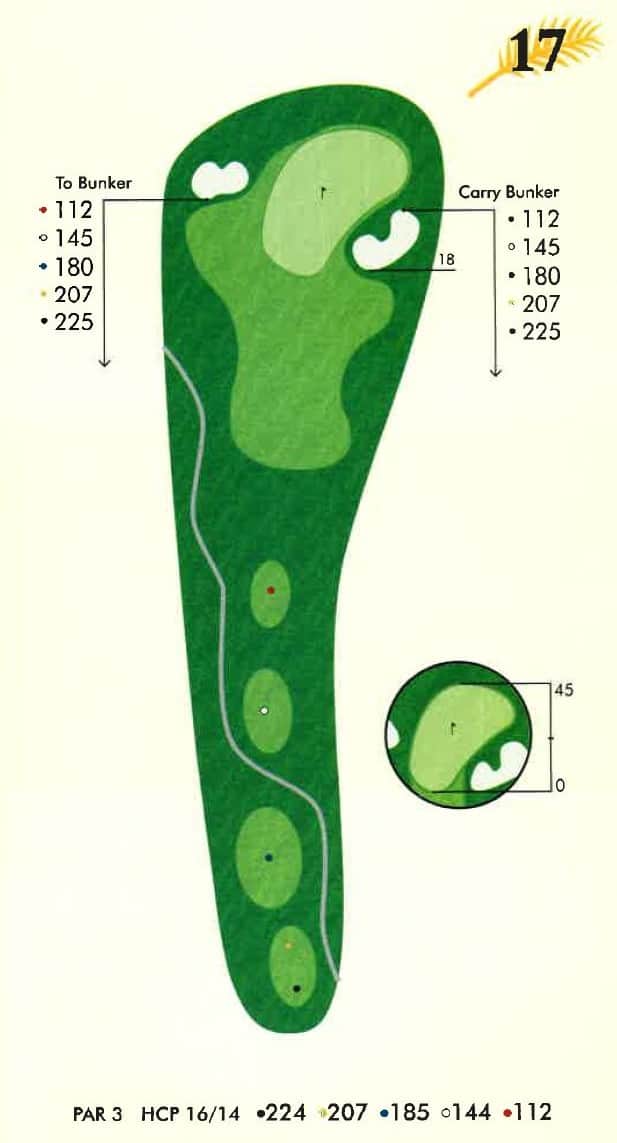
Hole #17
Hole #18